
Replying and templates
Open a ticket to read the whole conversation, reply or leave an internal note, change its status and tie it to a project.
How to
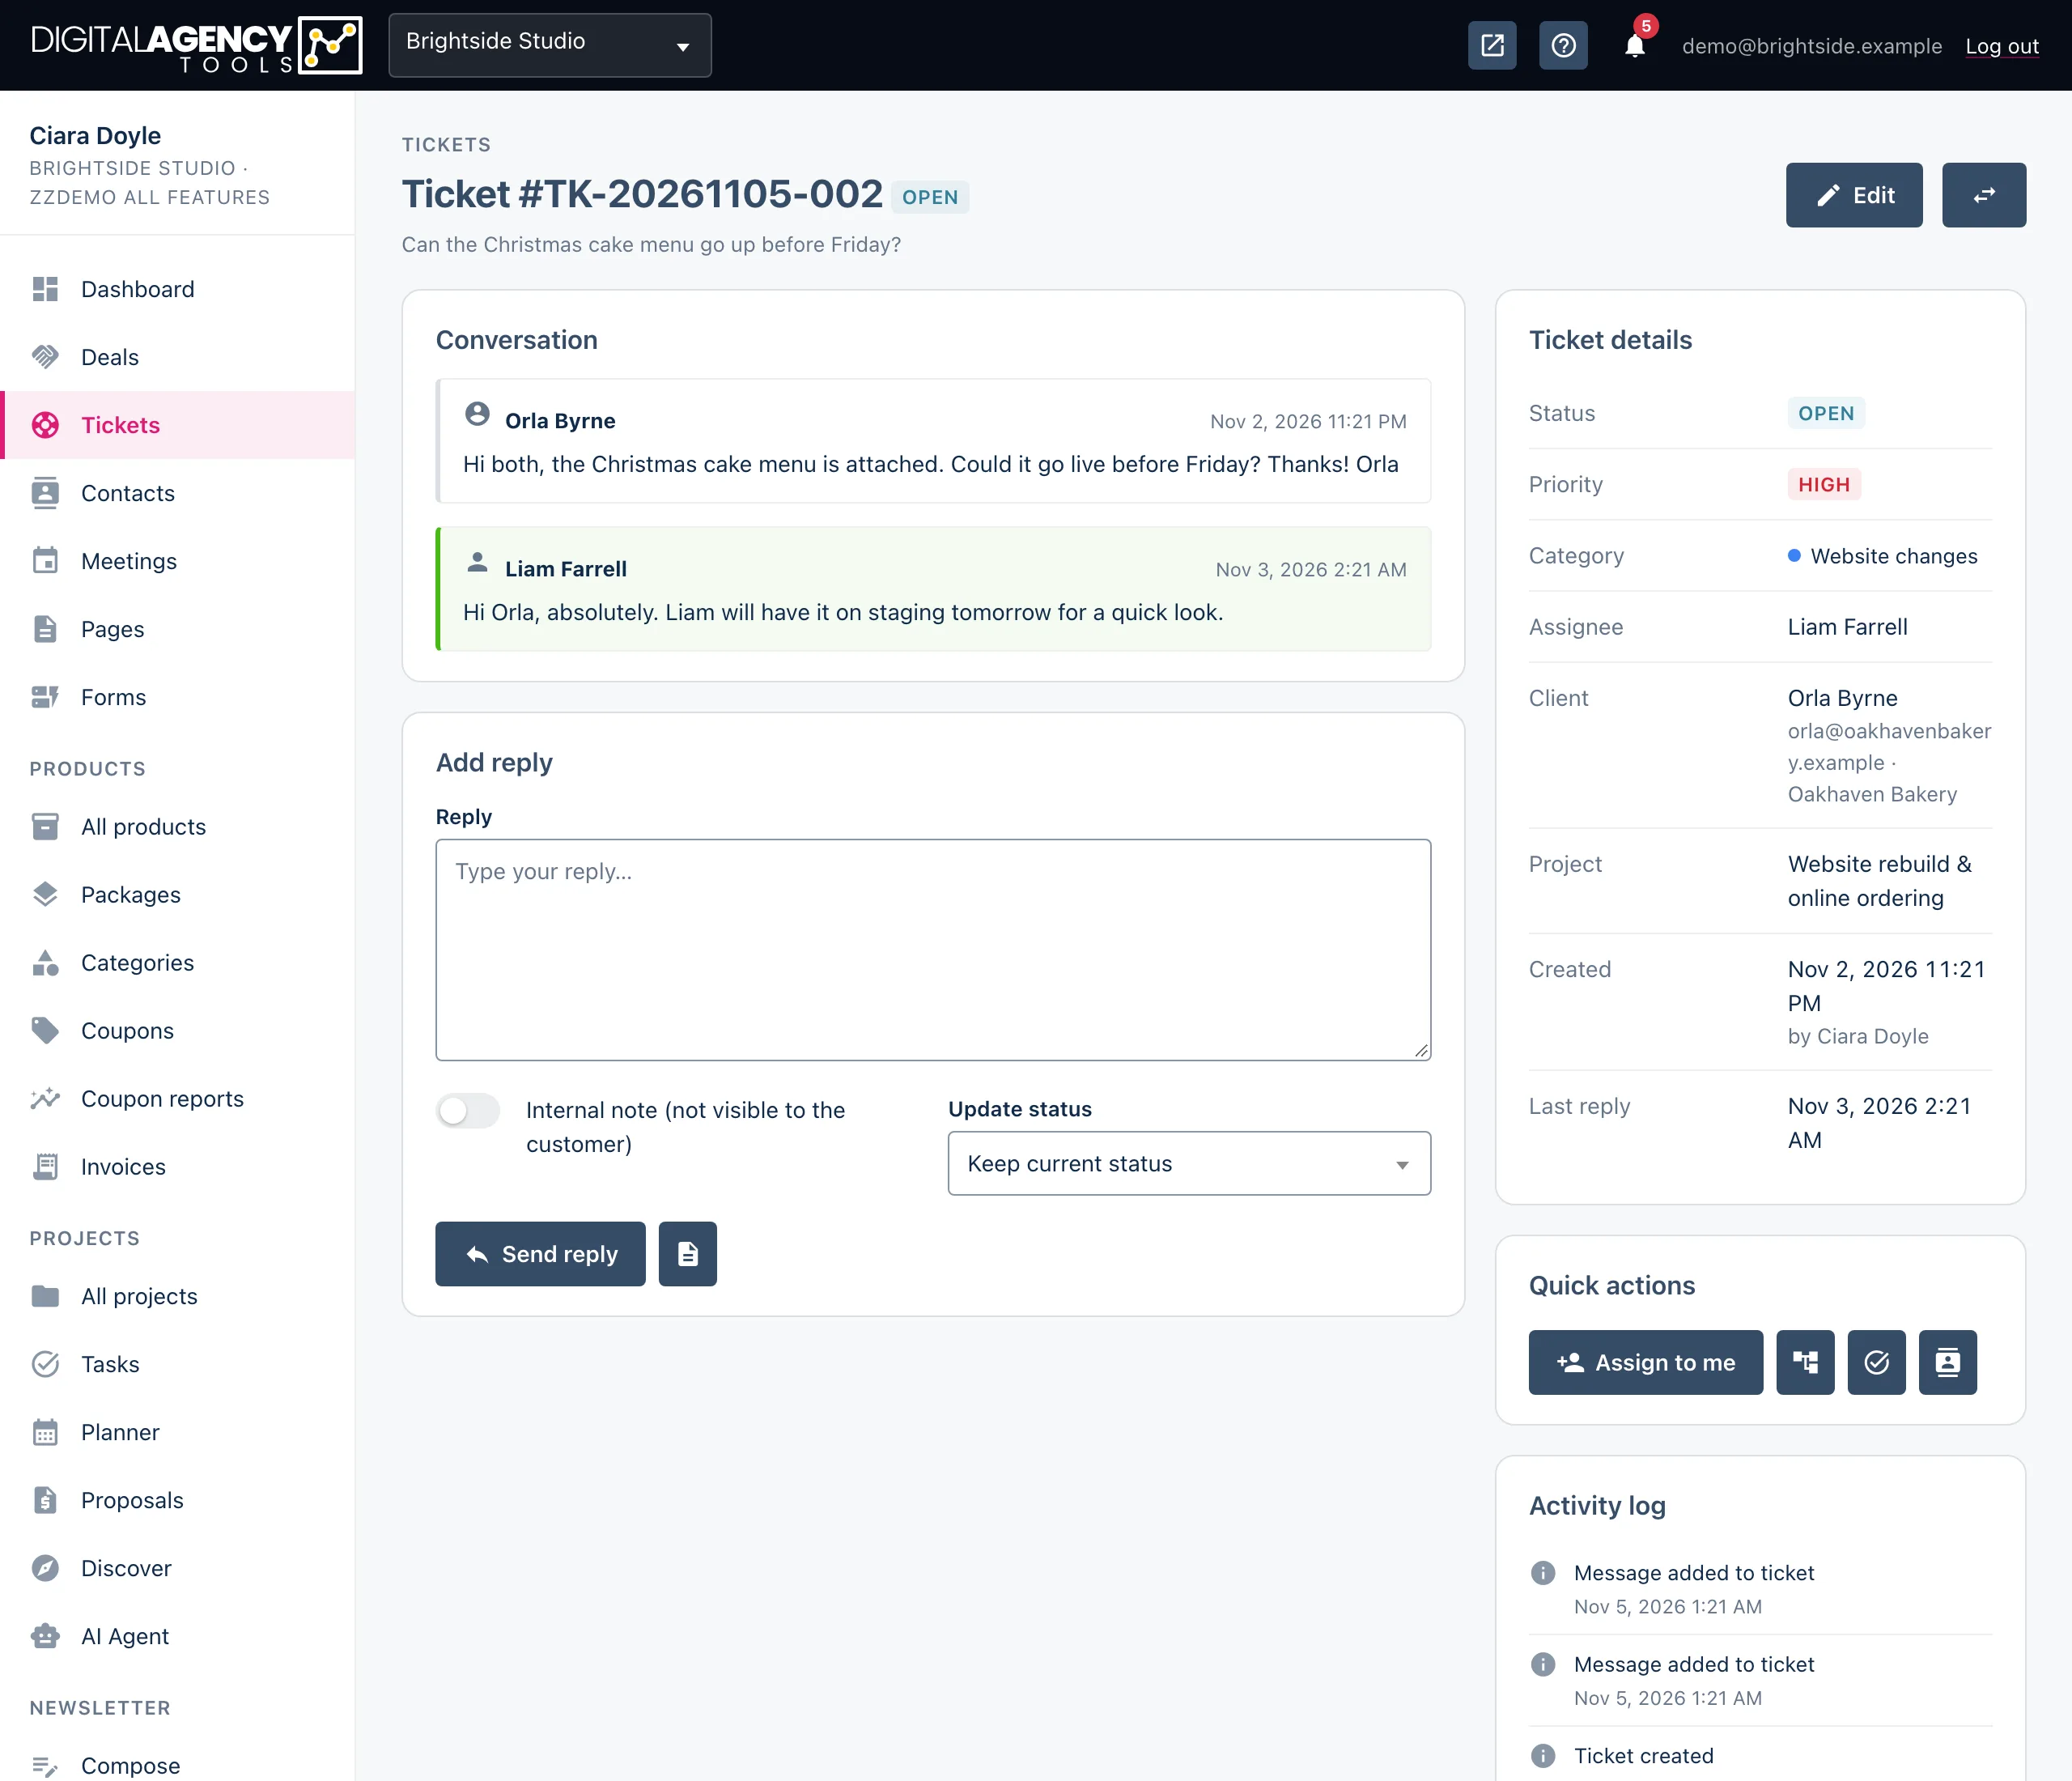
- Open Tickets and click the ticket.
- Type in the Add reply box. Tick Internal note if only your team should see it.
- Optionally pick a new status under Update status, for example Pending while you wait on the client.
- Click Send reply.
The conversation
Messages run oldest first. Your team's replies are marked with the person who wrote them; the client's carry their name or email address. Internal notes are tagged Internal note so nobody mistakes one for a reply.
Photos, voice notes, videos and documents that arrived over WhatsApp show in the message. Pictures and video play inline; other files download.
Reply or note?
Reply          the client's conversation
Internal note  team only, never sent
Where your reply goes
Every reply is saved on the ticket. If the ticket came in over WhatsApp, a public reply is also sent back to the sender on WhatsApp, from your business's linked phone, signed with your business name and the ticket reference. Internal notes never leave the panel.
Any other ticket (from email, the public support form, or one you opened
for a contact) has a public reply emailed to the client. It goes to the
address they last wrote from, or the linked contact's email. The subject
carries the ticket number, for example
Re: Website down [TK-20261105-001].
Changing status, priority and owner
The swap icon at the top of the page is the quickest way to change status: Mark open, Mark pending, Mark resolved or Close ticket. It is hidden once a ticket is closed.
Edit opens every field at once: subject, status, priority, category, assignee, client and tags. Click Update ticket to save. Every change is written to the Activity log with who made it.
Quick actions
Assign to me     you become the owner
Link to project  by project number
Create task      a task from this ticket
Linking to a project and creating a task
Link to project asks for the project's number, the one
in its address (/projects/42). The project then shows on the
ticket's details.
Create task turns the ticket into a task titled Support Ticket: <subject>, assigned to the ticket's owner (or you). The task goes into the linked project. With no linked project it uses the client's support project, so link a project first if the client has none. A note on the ticket records the new task's number.
Reply templates
The document icon next to Send reply lists the saved reply templates for the ticket's category. Pick one and it fills the reply box, ready for you to edit before sending. If nothing matches, you see No templates available for this category.
Still stuck?
Can't find what you're looking for? Send us a message and we'll reply by email.