
Compose and send
Write a newsletter, add a cover photo and the products you want to promote, send yourself a test, then send it to every active subscriber.
How to
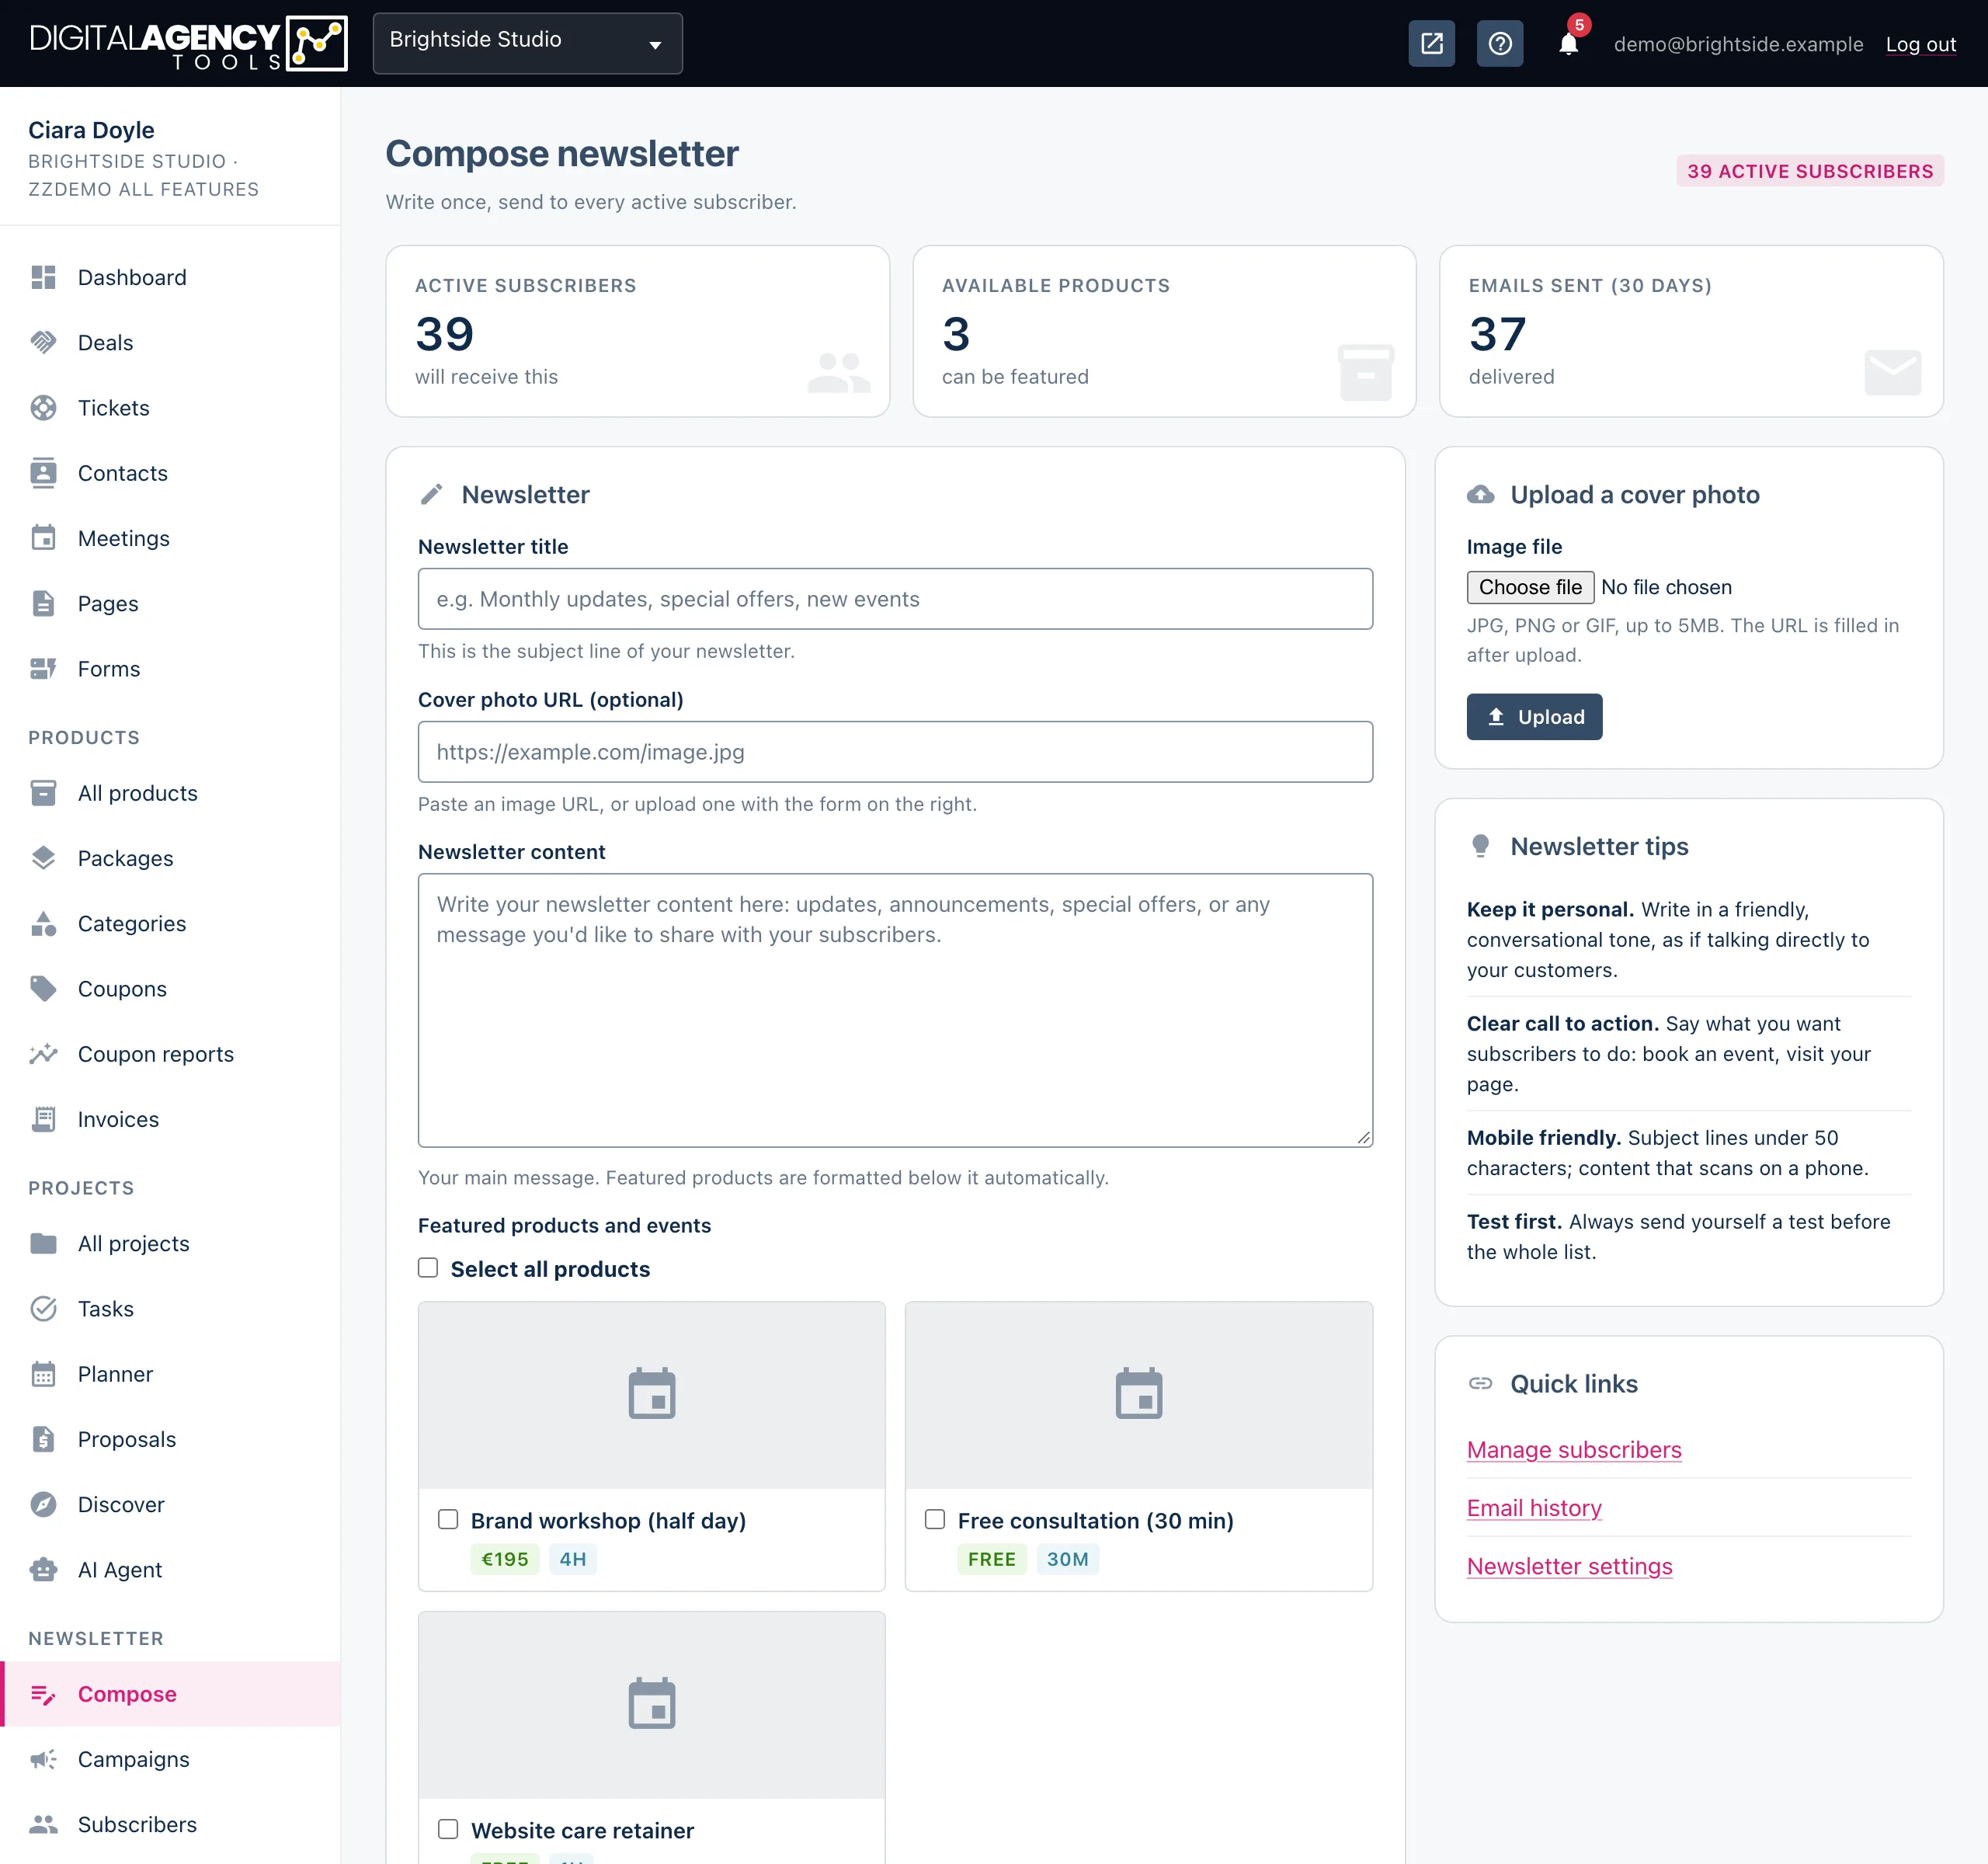
- Open Newsletter → Compose in the sidebar.
- If you want a cover photo, upload it first under Upload a cover photo: choose the file and click Upload. The Cover photo URL fills in for you.
- Enter the Newsletter title. It becomes the email subject.
- Write the Newsletter content.
- Tick any products under Featured products and events.
- Tick Send a test email first and click Send test email. Check it in your inbox.
- Untick the test box, click Send newsletter and confirm with Send now.
The tiles
Across the top: Active subscribers (who will receive it), Available products (active products you can feature) and Emails sent (30 days).
If Active subscribers is zero, there is nobody to send to yet. Add people in Subscribers or turn on the signup on your booking page.
The email
Subject   <title> - <business name>
          [TEST] in front for a test
Body      cover photo
          your content
          featured products
          unsubscribe link
Content
The content box is plain text. Line breaks are kept, but formatting and HTML are not, so write short paragraphs separated by a blank line.
Each featured product is laid out under your content with its price, duration and a link to book it. Select all products ticks every one.
Cover photo
JPG, PNG or GIF
up to 5MB
or paste any image URL
Test first
With Send a test email first ticked, the button reads Send test email. Your own address is filled in; add more, separated by commas, to show a colleague. Test emails have [TEST] in the subject and no unsubscribe link, and they are not counted in your history.
Sending for real
A live send asks you to confirm how many active subscribers it will go to. Each subscriber gets their own email with a personal unsubscribe link. When it finishes you see how many were sent, and how many failed if any did. The newsletter is saved under Campaigns → Sent and each email is logged in Email history.
Emails go out from your verified email domain if you have one. See Send email from your domain.
Save a draft
The save icon next to Send newsletter saves what you have as a draft without sending it. Drafts are listed under Newsletter → Campaigns.
The newsletter is part of your plan. If your sidebar shows Newsletter with an Upgrade chip, see Plans and features.
Still stuck?
Can't find what you're looking for? Send us a message and we'll reply by email.