
Your first client, start to finish
This walkthrough takes one client from first contact to a paid invoice. Each step links to the full article, so follow it once end to end and come back to the detail when you need it.
The ten steps
- Add the contact. Contacts → Add contact. Enter the Contact name and Email, set Contact type to Prospect, and optionally a Pipeline stage and Deal value. Click Create contact.
- Run a discovery (optional). Projects → Discover → New discovery. Paste your notes or the email thread, extract a brief, then Mark brief ready and Create proposal. The proposal starts with the brief's summary and deliverables filled in.
- Write the proposal. Or start one directly: Projects → Proposals → New proposal, pick the client and give it a title. Fill in the introduction, scope, timeline milestones, pricing lines and terms, then Save proposal.
- Send it. Click Send. The client is emailed a link to the proposal, and the link is shown to you once so you can copy it. You get a notification when the client opens it.
- The client accepts. On their page they enter their name and email and click Accept proposal. The project is created for you straight away (see below).
- Ask for a deposit (optional). Back on the accepted proposal, the Deposit invoice card creates an invoice for a percentage or a fixed amount and emails it to the client with a pay link.
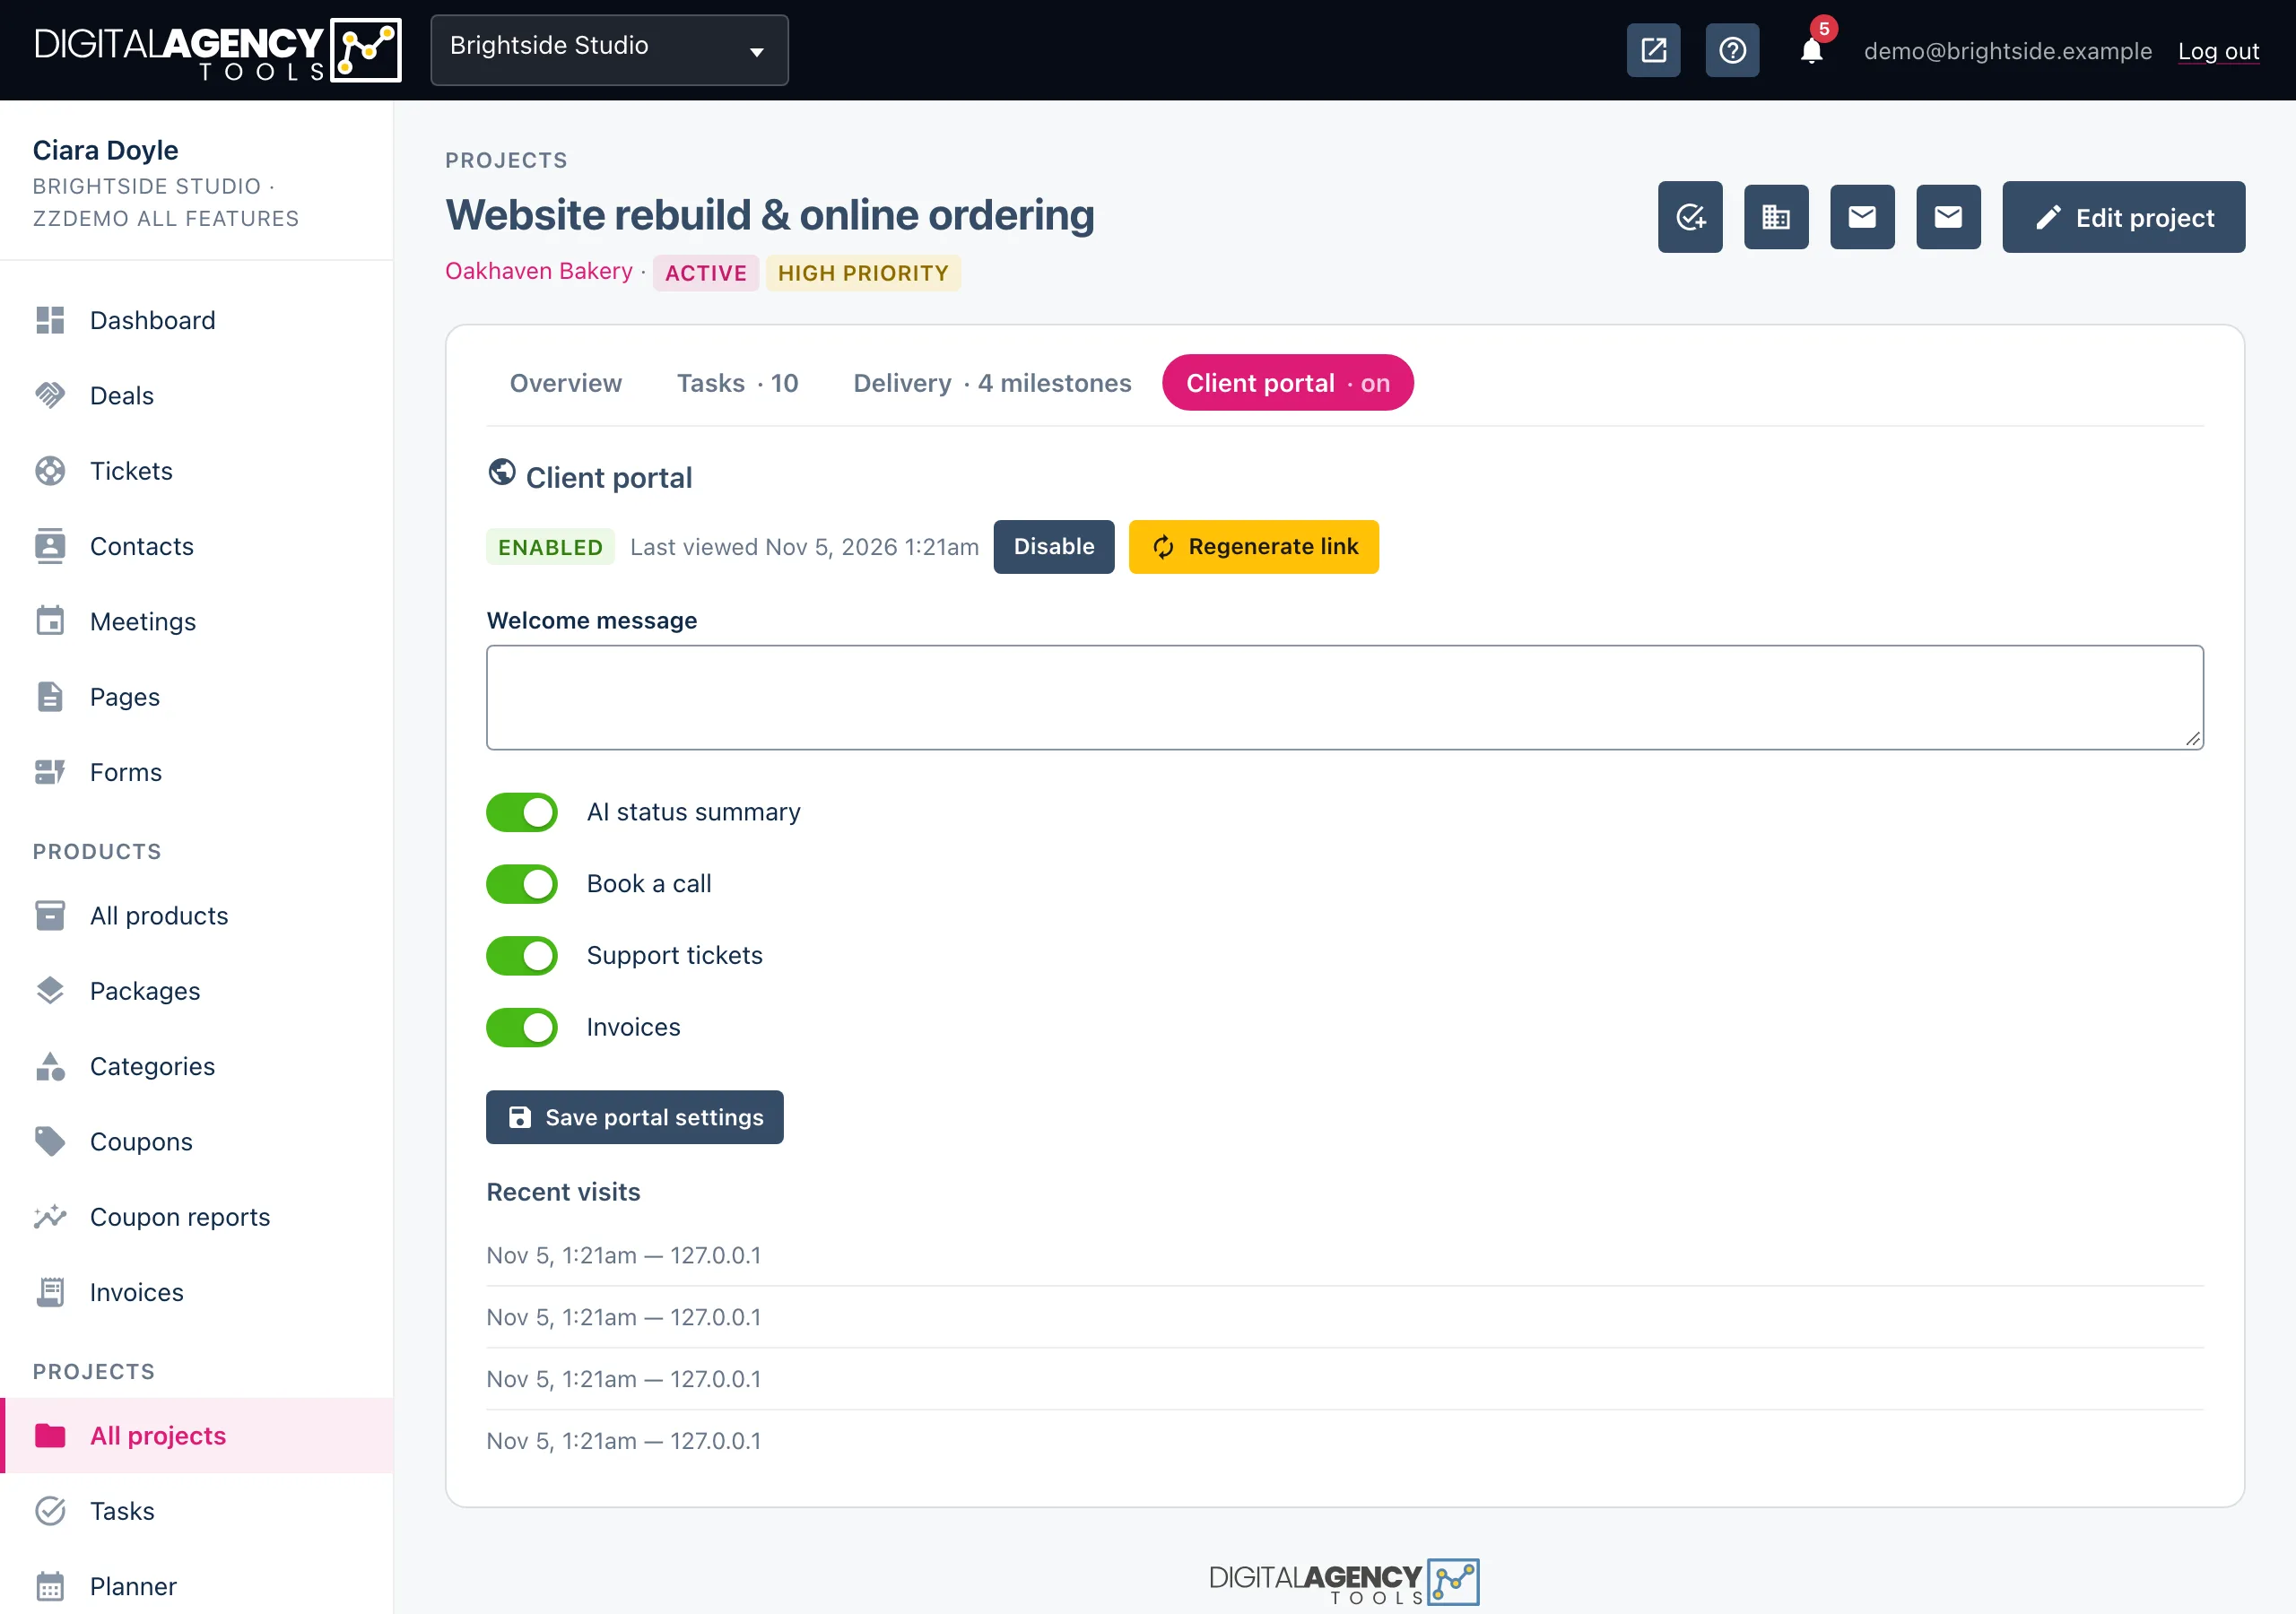
- Share the portal. Open the project, choose the Client portal tab, click Regenerate link and copy the link it shows you. Send it to the client.
- Plan the work. Add tasks from the project's Add task icon or its Tasks tab, and schedule them on Projects → Planner.
- Keep the client posted. On the project, click the Client updates icon, choose a type, write the subject and body (or click Draft with AI and edit what it writes) and click Send.
- Invoice and get paid. Products → Invoices → New invoice, add lines and click Issue and email. The client pays by card from the link, or tells you they paid by transfer and you click Confirm received.
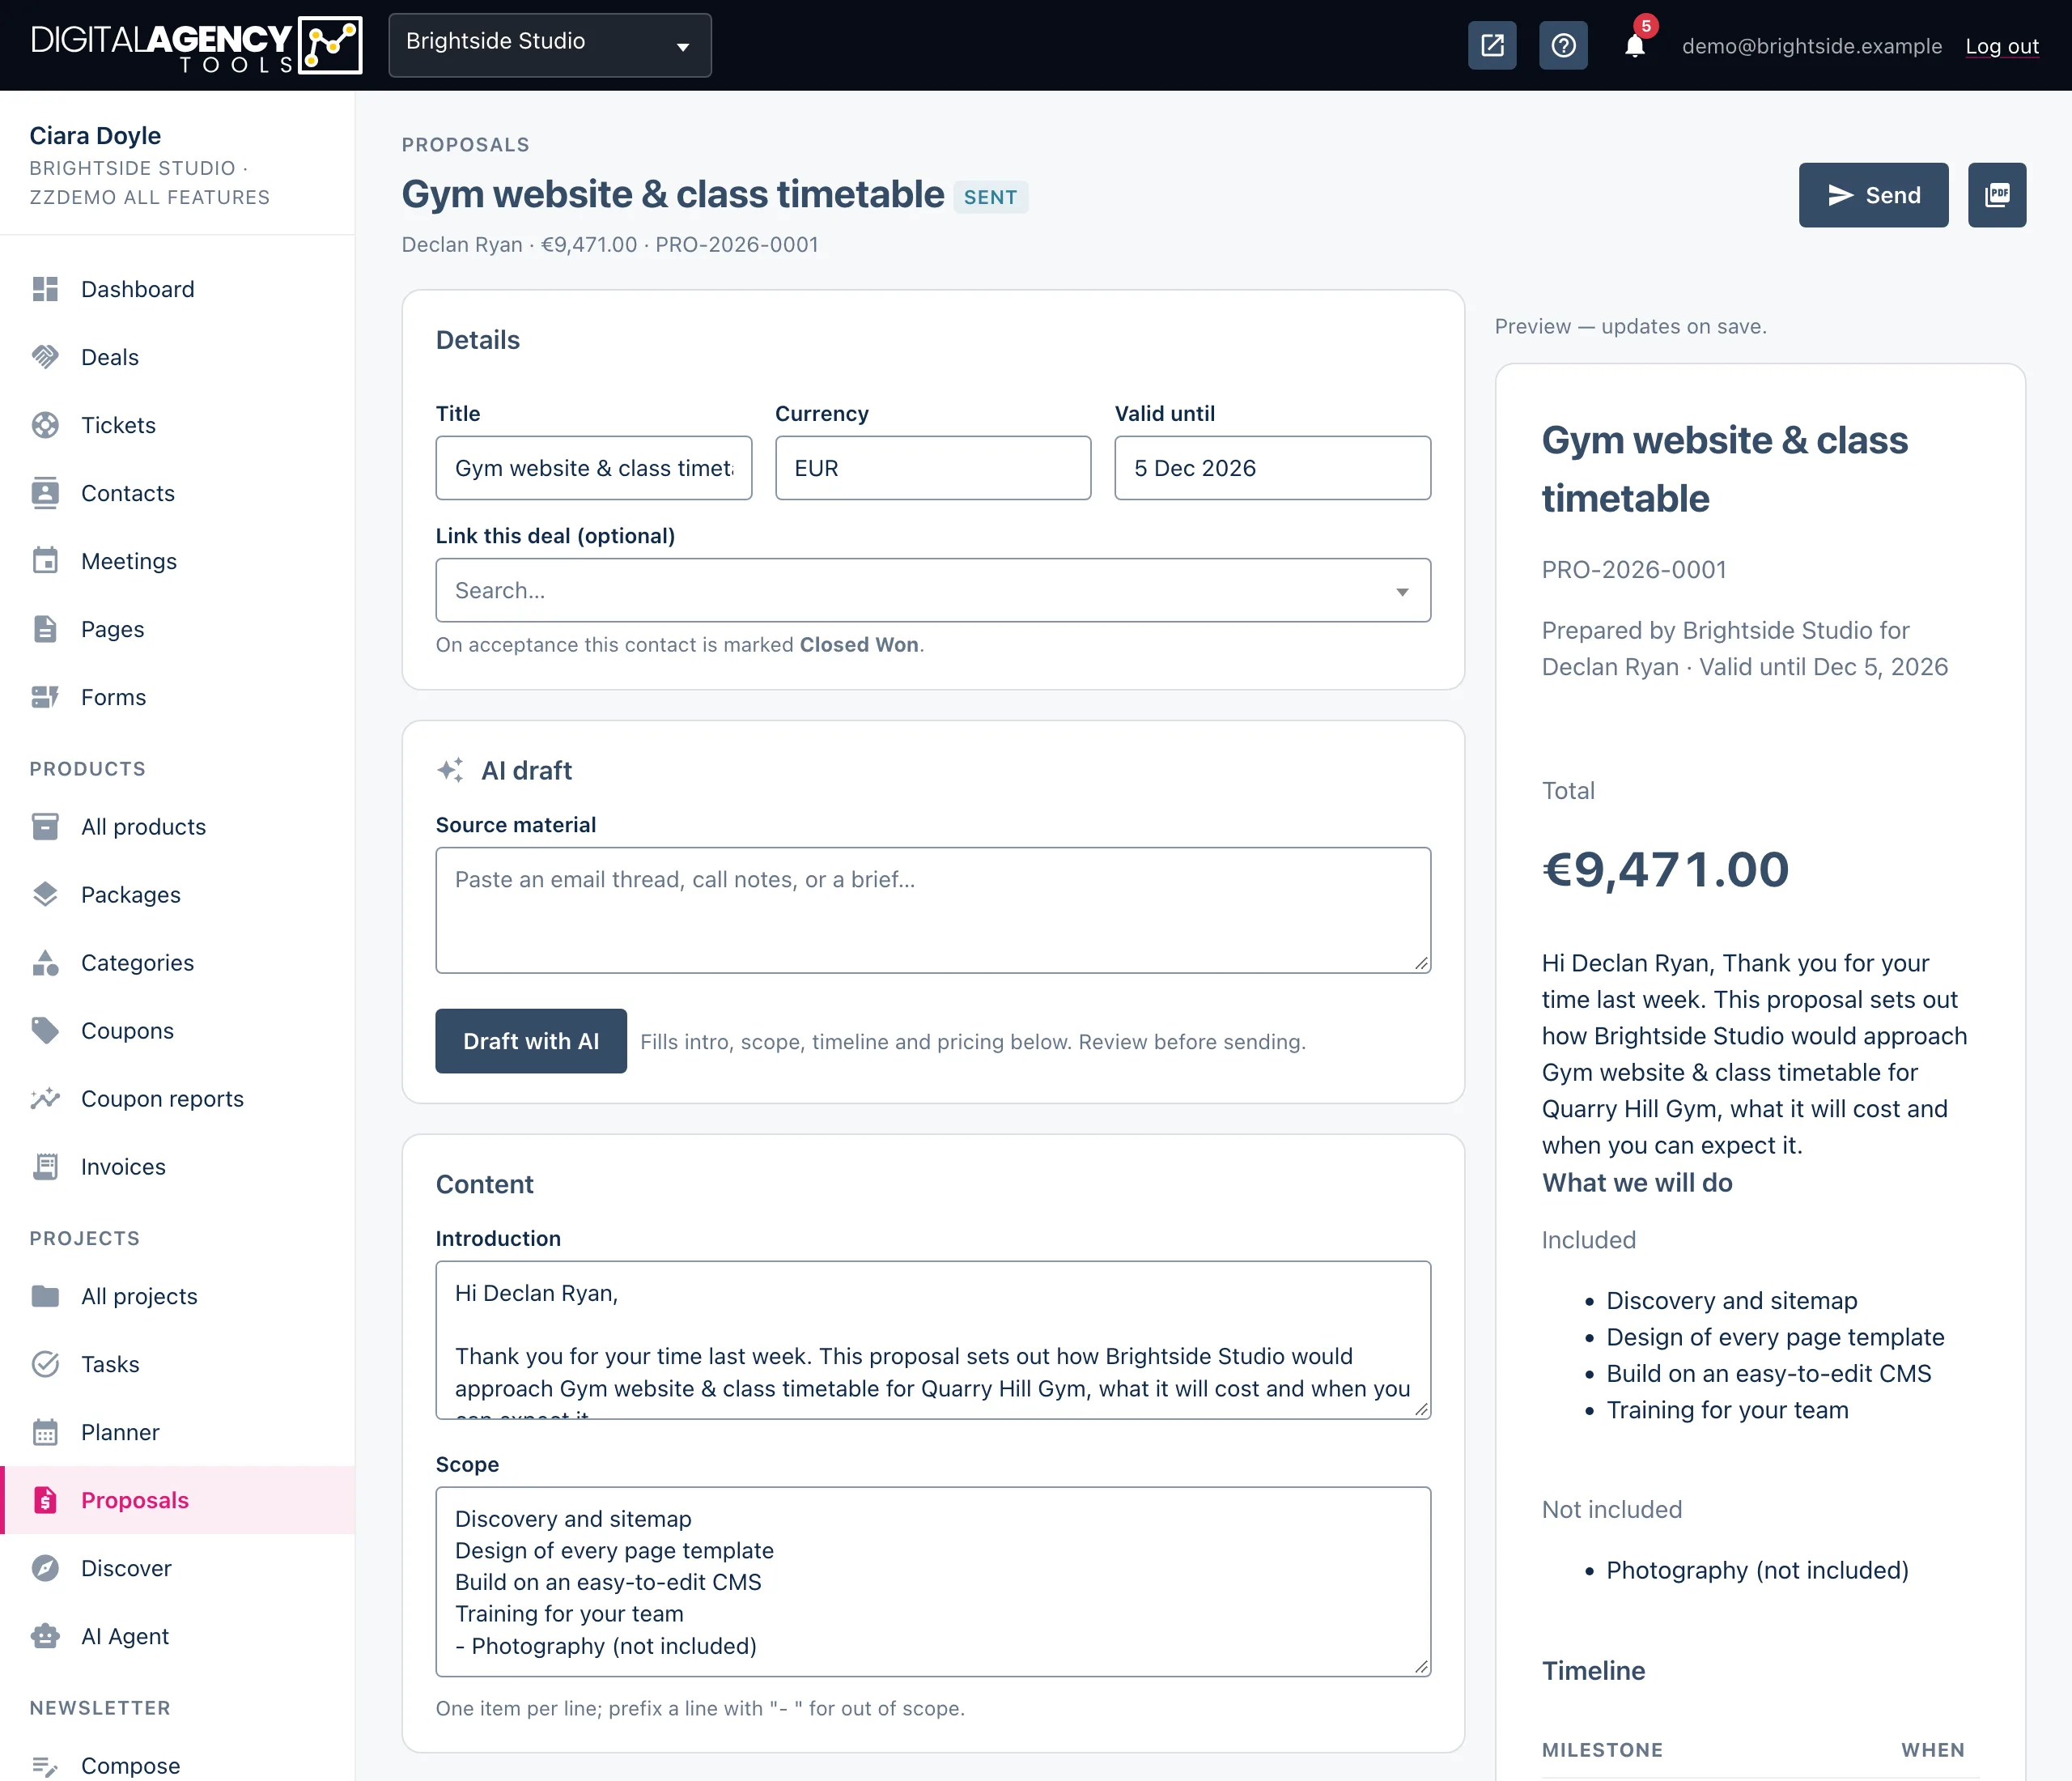
What accepting does for you
The moment the client clicks Accept proposal, a project is created with the proposal's title and the client, status active, starting today. Then:
- each timeline milestone becomes a project milestone, with its due date;
- each scope line becomes a scope item (lines starting
-are marked as not included); - a Kick off task is added for every milestone, plus a task for any pricing line you marked to become one;
- the project's client portal is created;
- if you linked a deal, that contact is marked as a won client.
You get a Proposal accepted notification that opens the new project.
Proposal statuses
draft → sent → opened
              ↘ accepted → project
              ↘ declined
              ↘ expired (past
                "Valid until")
Links are shown once
Proposal, portal and pay links are long private links. We only keep a fingerprint of each one, so a link is shown to you once, when it is made. Copy it then.
That is why step 7 says Regenerate link: the portal made when the client accepted already has a link, but nobody has seen it. Regenerating gives you a fresh one to send. Any older portal link stops working.
Before you start
Set up your business name, logo and currency first, so the proposal, portal and invoice look right. To take card payments you need a plan with Stripe payments and your Stripe account connected; without it the client can still tell you they paid by transfer.
Discovery drafting, AI proposal drafts and client update drafts need AI to be configured. Without it, write the proposal and the client updates yourself — every step above still works.
Related
- Contacts
- Start a discovery and From discovery to proposal
- Create a proposal, Send it and get it accepted and Deposit invoices
- Turn a proposal into a project
- Turn on the portal and What clients see
- Tasks: list and board and The planner
- Write and send an update
- Create an invoice, Pay links and Bank transfer claims
Still stuck?
Can't find what you're looking for? Send us a message and we'll reply by email.